dbu ru (central horn)
Satellite Photo: Google|DigitalGlobe; edited by Hazod
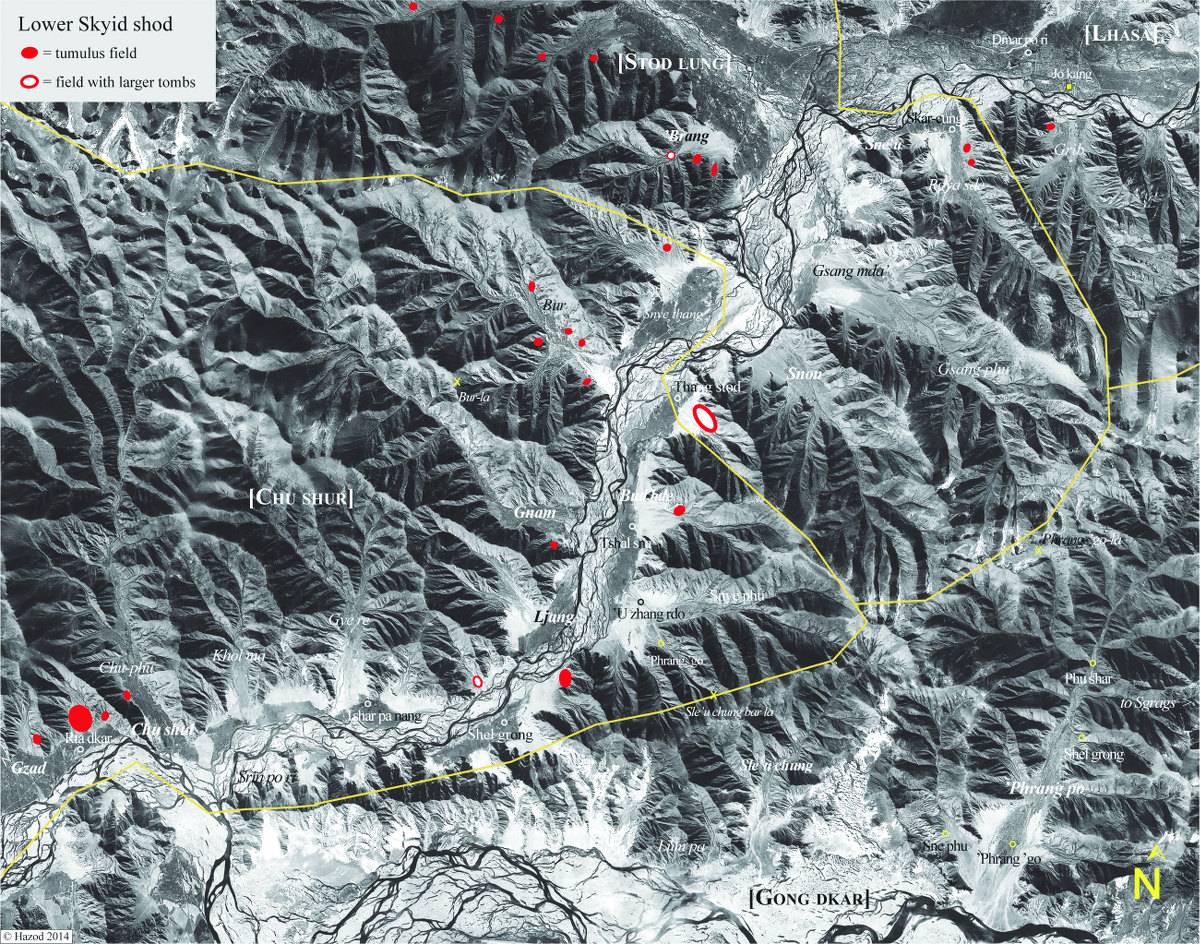
Fig. 1 The grave fields in Lower Skyid shod
Fig. 1: The grave fields in Lower Skyid shod (Satellite Photo: Google|DigitalGlobe; edited by Hazod)
Satellite Photo: Google|DigitalGlobe; edited by Hazod
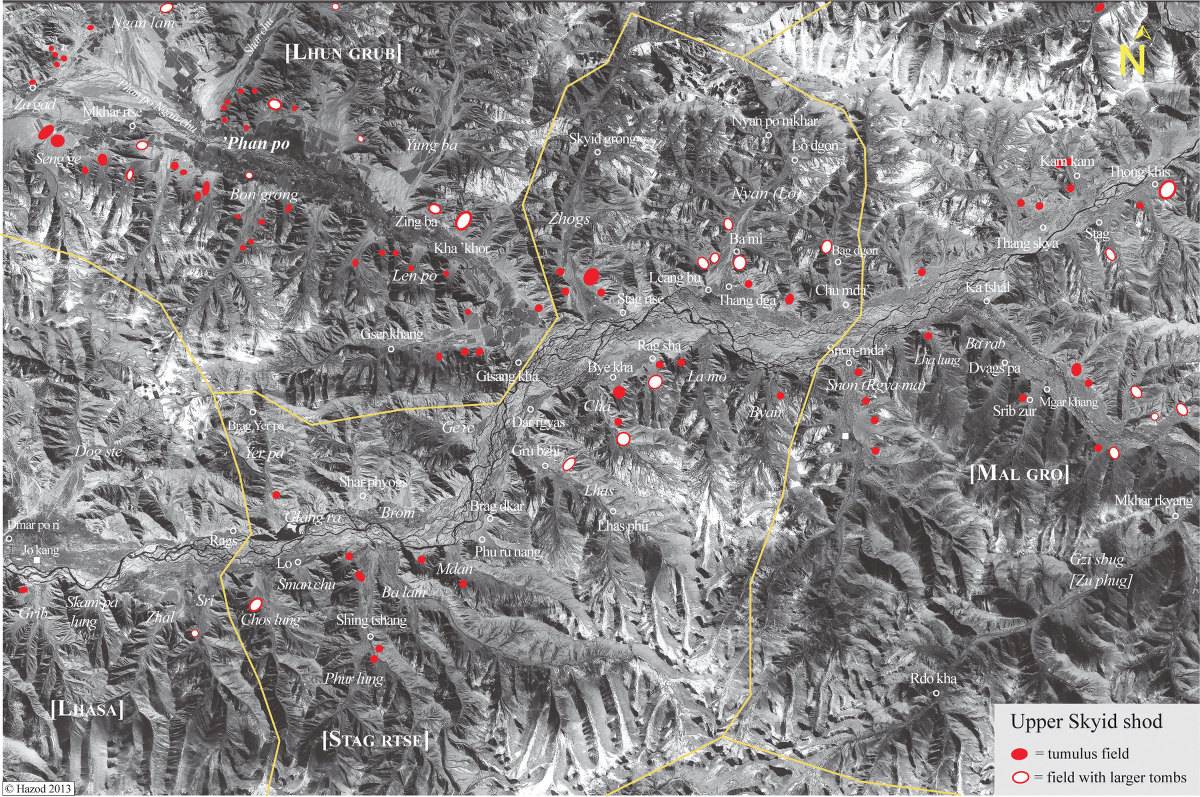
Fig. 2 The grave fields in Upper Skyid shod
Fig. 2: The grave fields in Upper Skyid shod (Satellite Photo: Google|DigitalGlobe; edited by Hazod)
Satellite Photo: Google|DigitalGlobe; edited by Hazod
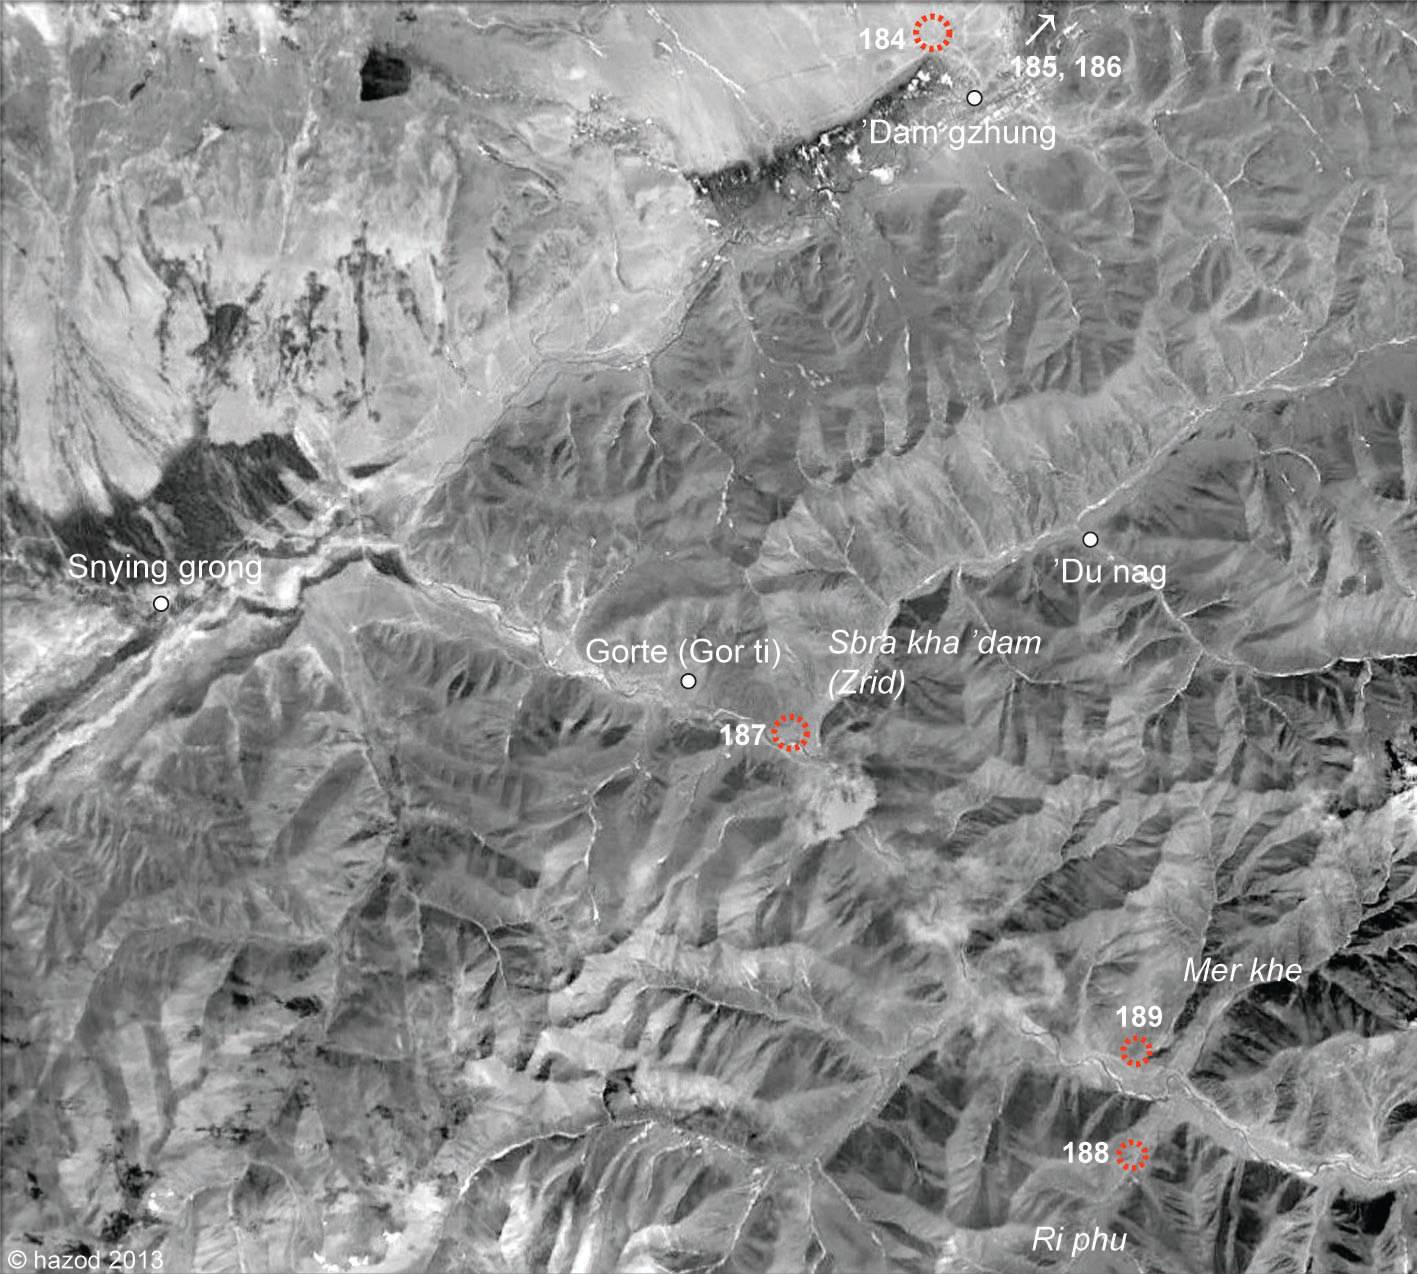
Fig. 3 The grave fields in the area of the upper Lha chu (Skyid chu)
Fig. 3: The grave fields in the area of the upper Lha chu (Skyid chu) (Satellite Photo: Google|DigitalGlobe; edited by Hazod)
Satellite Photo: Google|DigitalGlobe; edited by Hazod
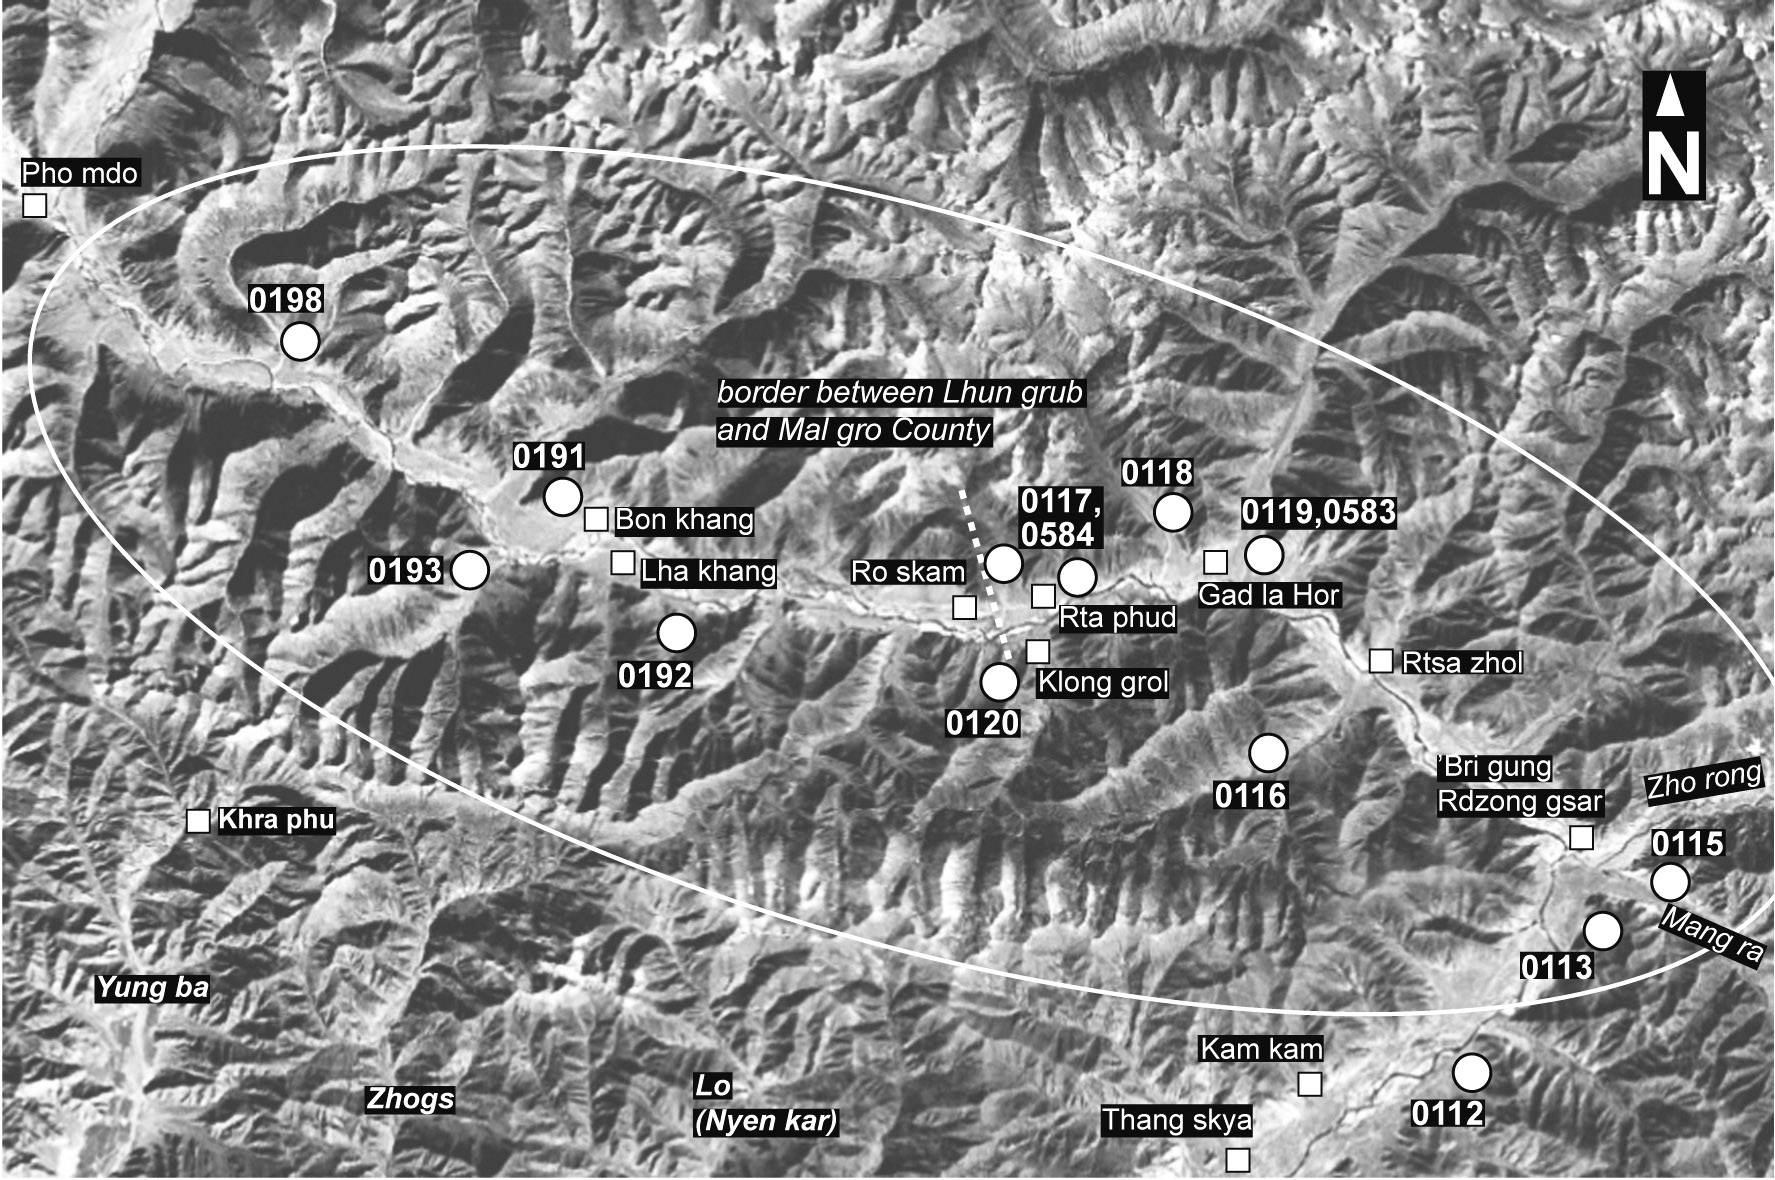
Fig. 4 The grave fields in the area of Klung shod
Fig. 4: The grave fields in the area of Klung shod (Satellite Photo: Google|DigitalGlobe; edited by Hazod)
Satellite Photo: Google|DigitalGlobe; Photos: Hazod; edited by Hazod
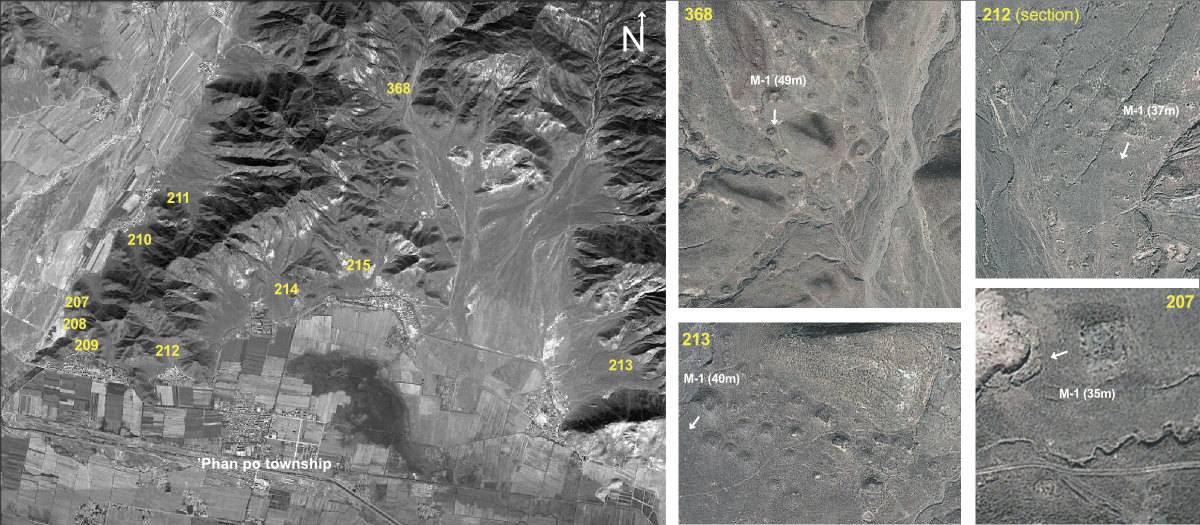
Fig. 5 The gave fields around ’Phan po township, Lhun grub County, with several major sites. (Arrow symbols indicate the (trapezoidal) tombs’ alignment.)
Fig. 5: The gave fields around ’Phan po township, Lhun grub County, with several major sites. (Arrow symbols indicate the (trapezoidal) tombs’ alignment.) (Satellite Photo: Google|DigitalGlobe; Photos: Hazod; edited by Hazod)
Satellite Photo: Google|DigitalGlobe; edited by Hazod
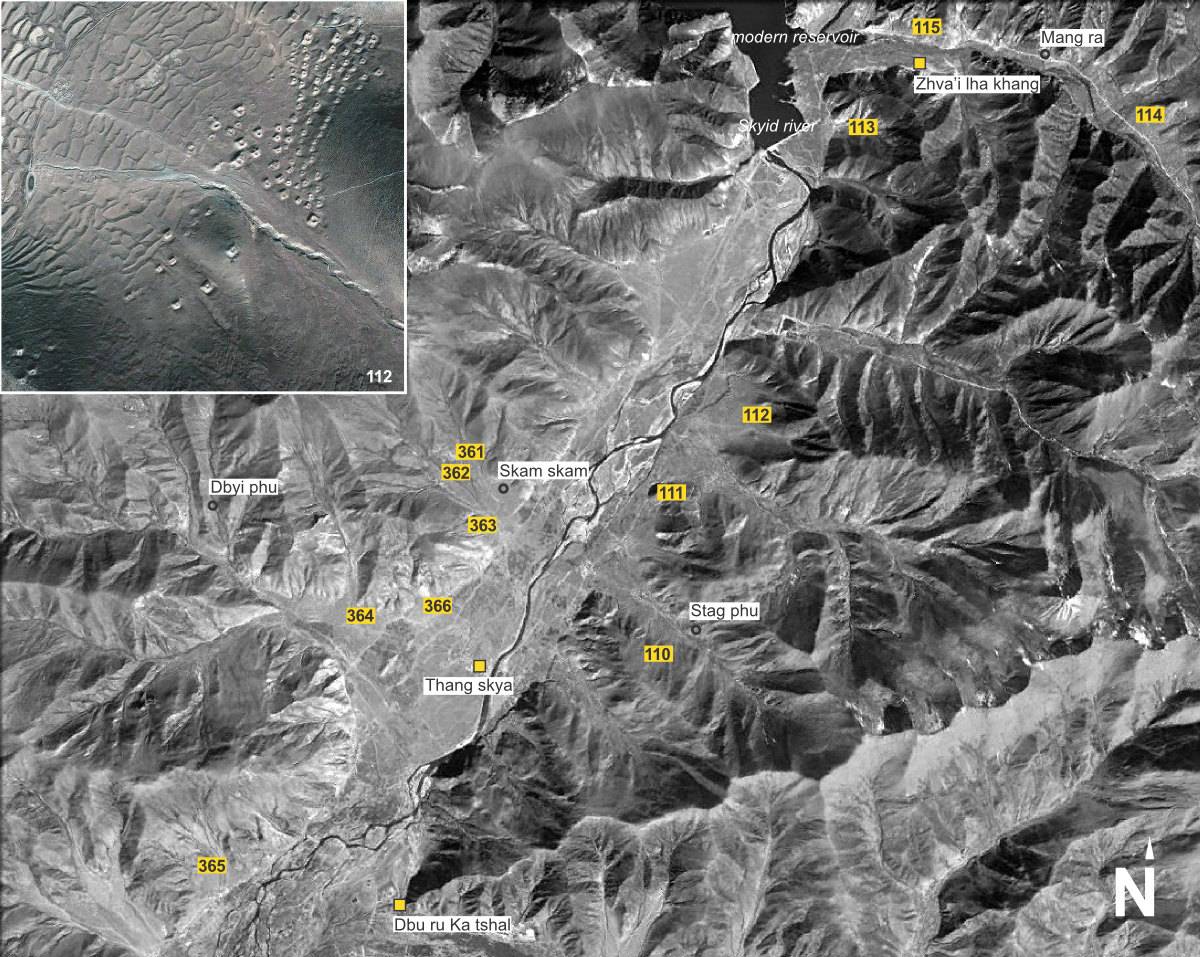
Fig. 6 Central Mal gro. (Including a sat-photograph of Thong khis (no. 112), the largest imperial era grave field of Mal gro.)
Fig. 6: Central Mal gro. (Including a sat-photograph of Thong khis (no. 112), the largest imperial era grave field of Mal gro.) (Satellite Photo: Google|DigitalGlobe; edited by Hazod)
Satellite Photo: Google|DigitalGlobe; Photos: Hazod; edited by Hazod
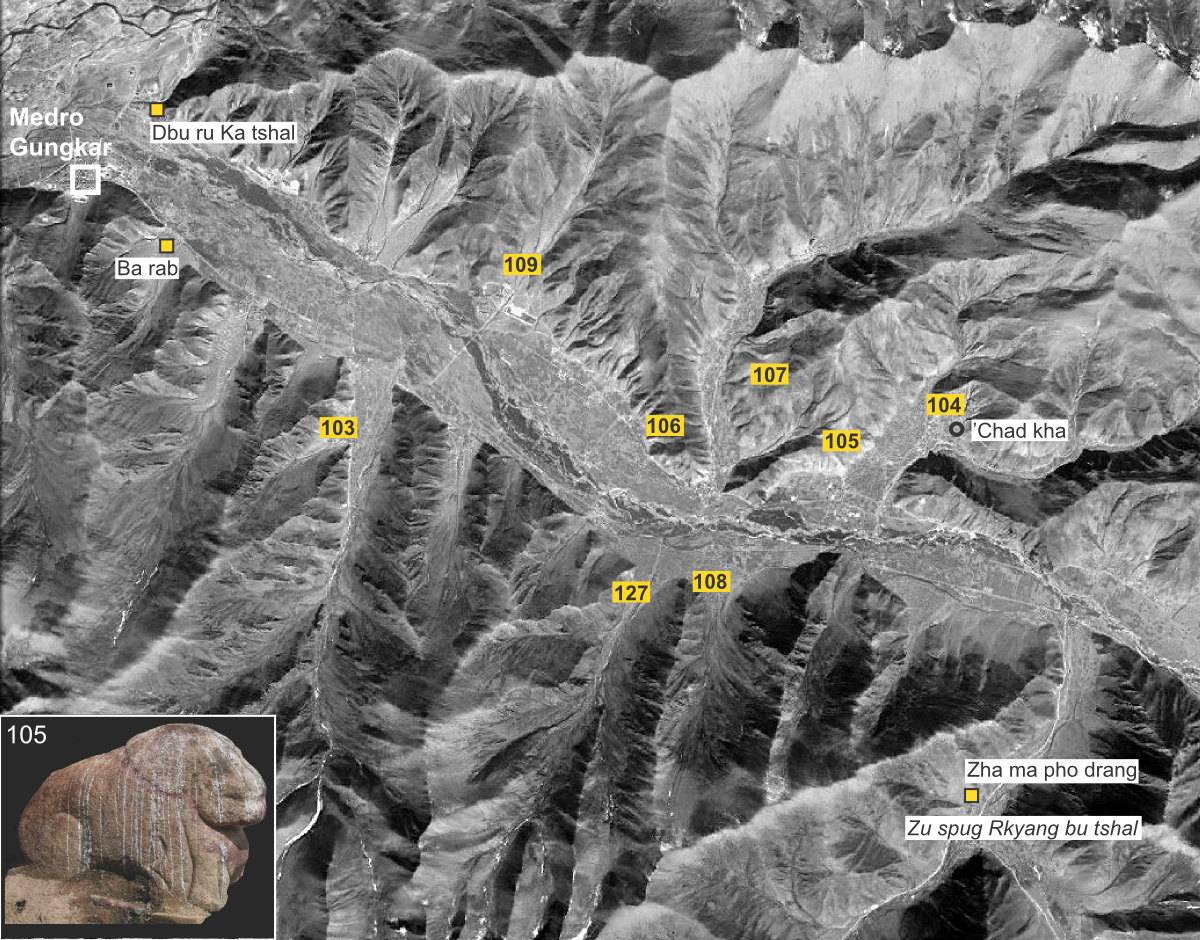
Fig. 7 Eastern Mal gro. (Including a photograph of the “grave lion of ’Chad kha”, related to grave field #0105.)
Fig. 7: Eastern Mal gro. (Including a photograph of the “grave lion of ’Chad kha”, related to grave field #0105.) (Satellite Photo: Google|DigitalGlobe; Photos: Hazod; edited by Hazod)

Satellite Photo: Google|DigitalGlobe; Photos: Hazod; edited by Hazod
Fig. 8 The upper regions of Yar lung and ’Phyong po. (The indications of burial mound sites on this map are restricted to the place of “Tibet’s first...
Fig. 8: The upper regions of Yar lung and ’Phyong po. (The indications of burial mound sites on this map are restricted to the place of “Tibet’s first... (Satellite Photo: Google|DigitalGlobe; Photos: Hazod; edited by Hazod)
Satellite Photo: Google|DigitalGlobe (12/16/2013); edited by Hazod 2017
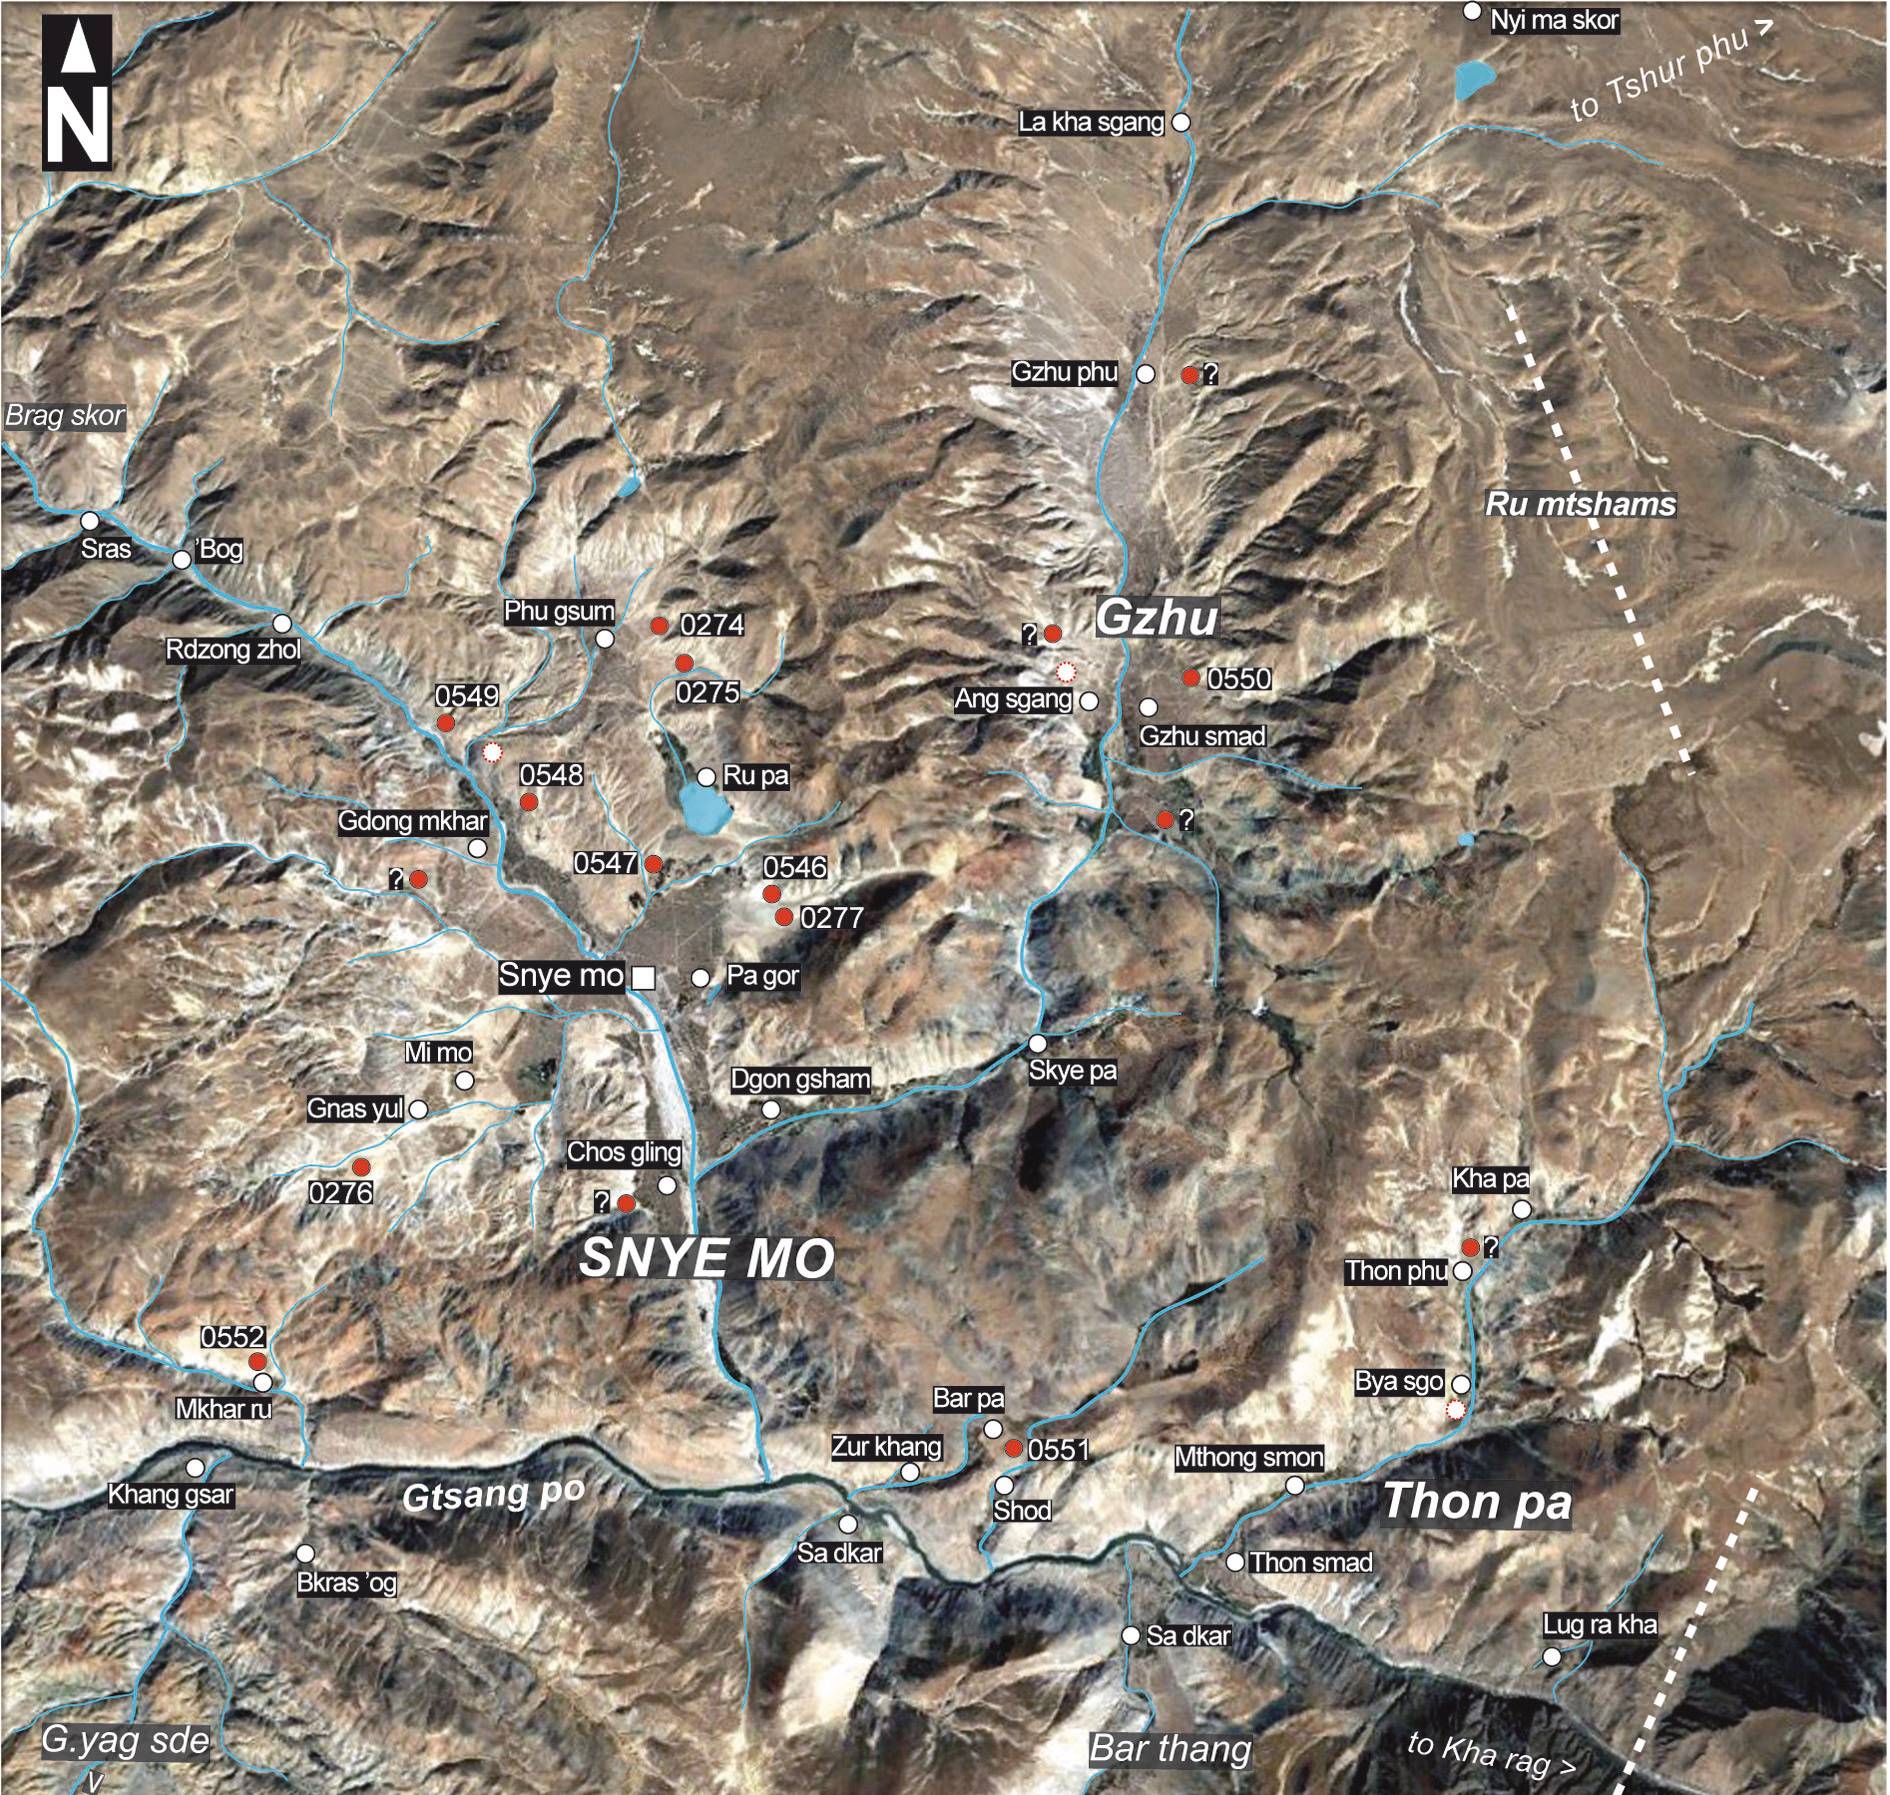
Fig. 9 The burial mound sites (red symbols) of Snye mo and Gzhu in the boarder area between G.yas ru and Dbu ru
Fig. 9: The burial mound sites (red symbols) of Snye mo and Gzhu in the boarder area between G.yas ru and Dbu ru (Satellite Photo: Google|DigitalGlobe (12/16/2013); edited by Hazod 2017)
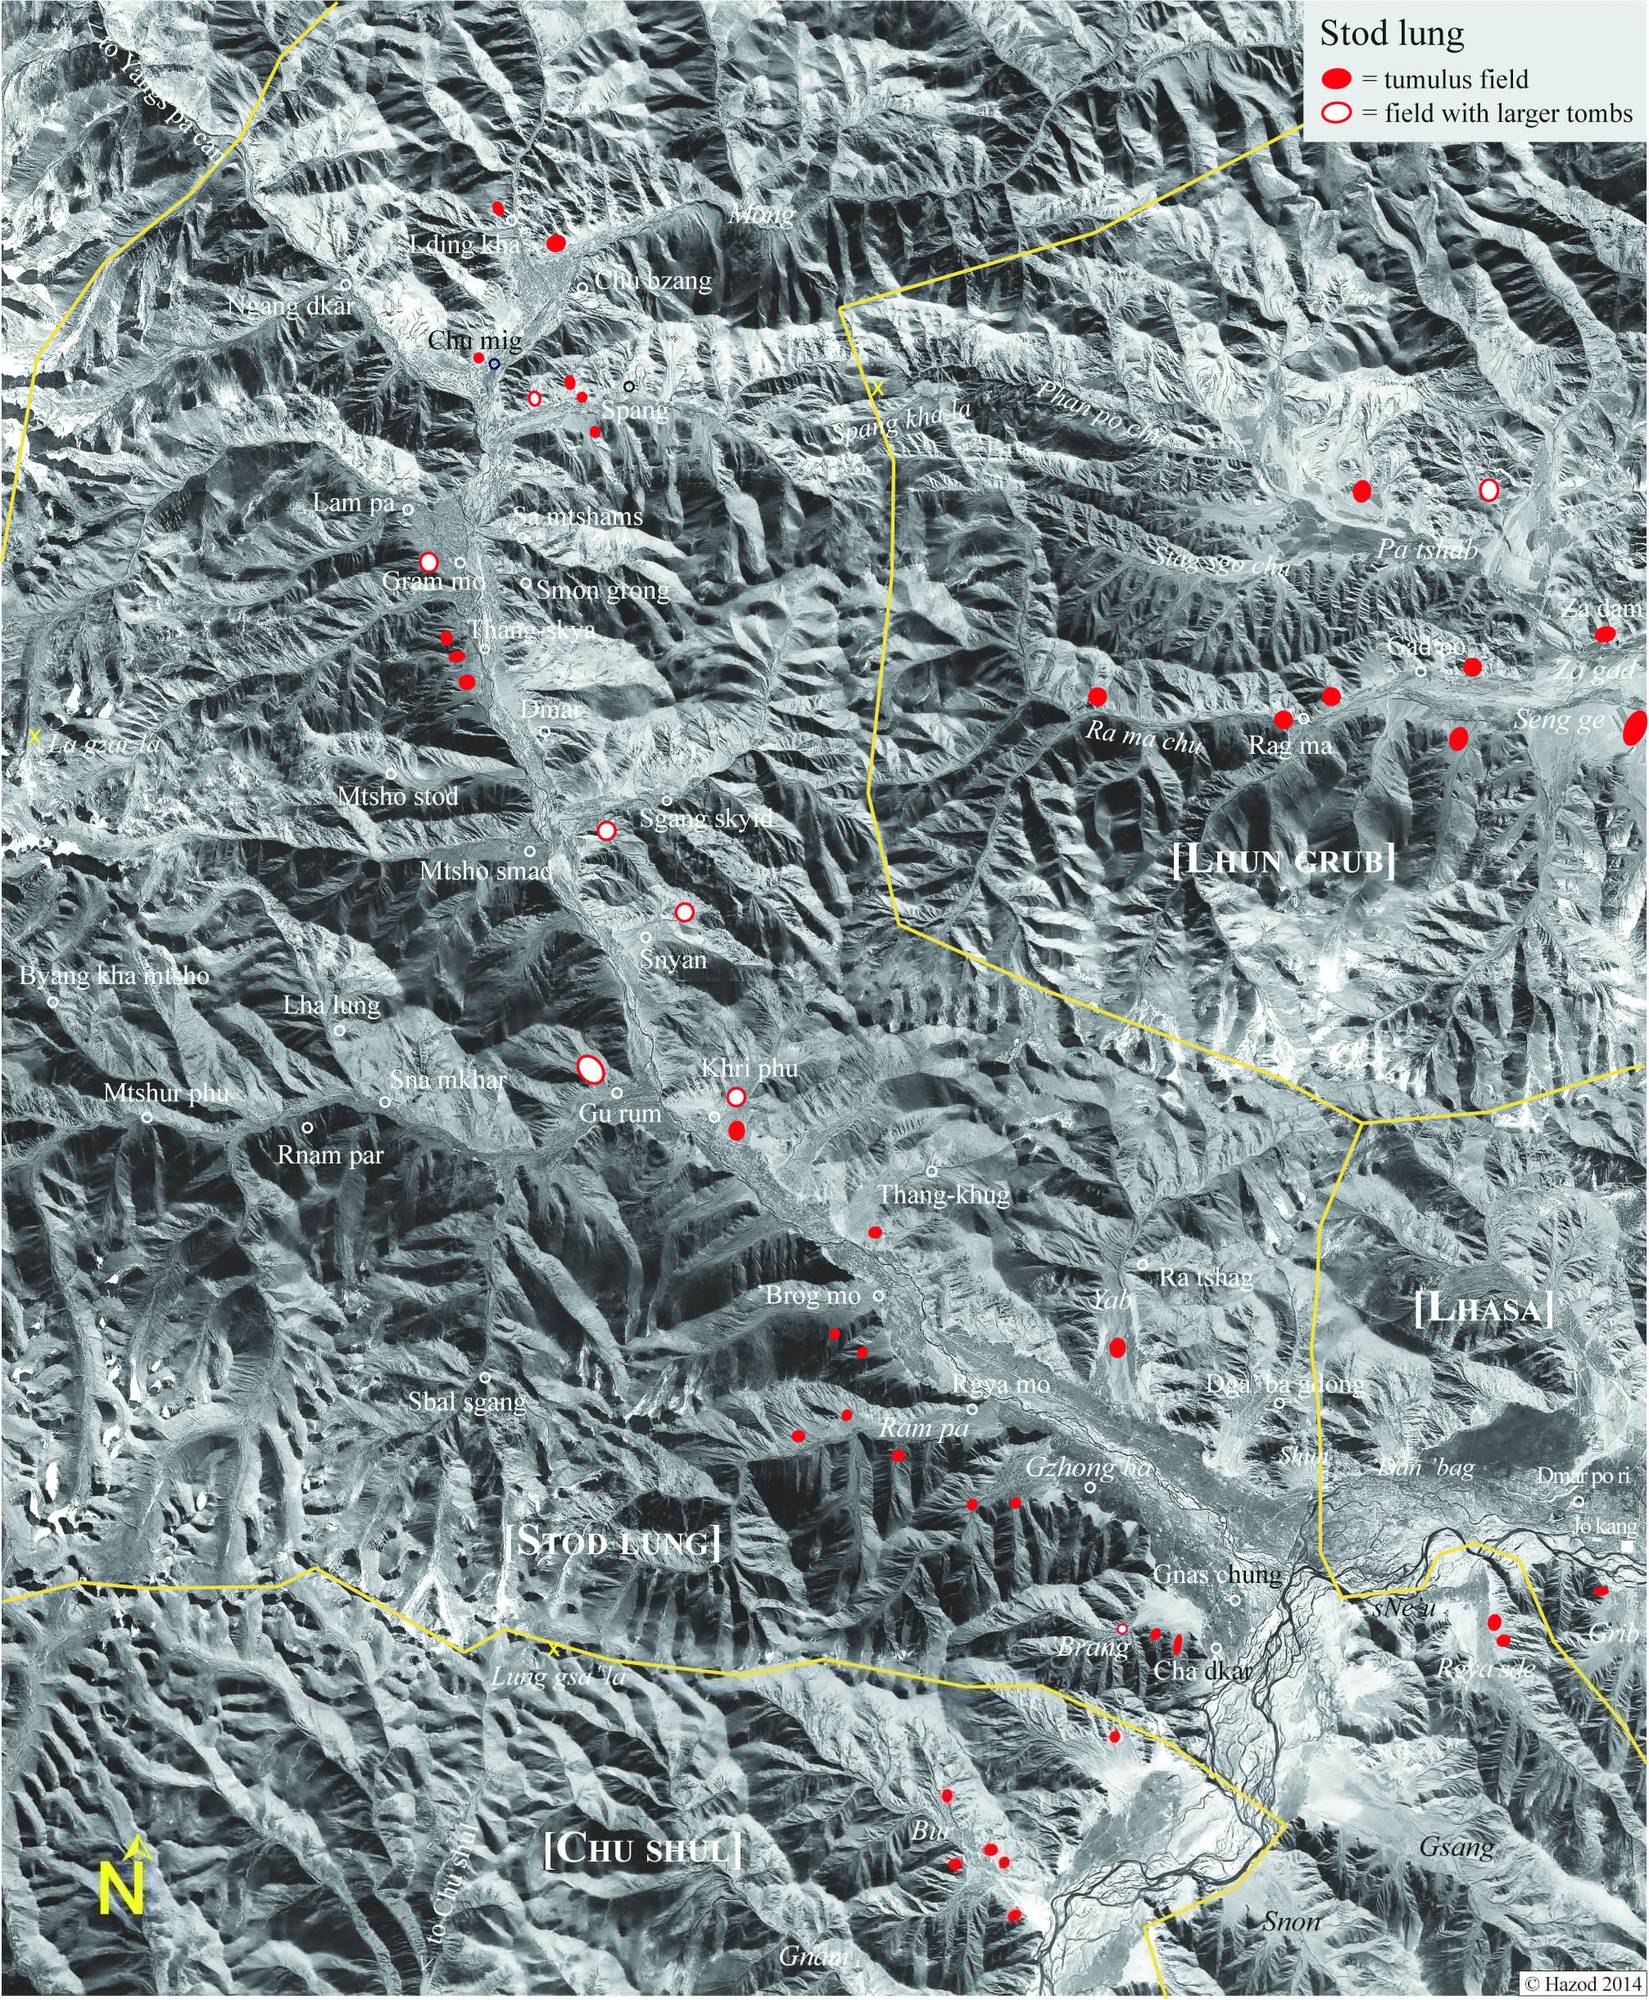
Satellite Photo: Google|DigitalGlobe; edited by Hazod
Fig. 10 The grave fields in Stod Lung
Fig. 10: The grave fields in Stod Lung (Satellite Photo: Google|DigitalGlobe; edited by Hazod)